Create a real-life example (Function, Service Bus Queue, Storage Table) of an Azure Logic App. A step to step example.
Some time ago I wrote an article with an example of an Azure Function which I used in my applications. With the current article I want to present you another real-life example of using different Azure Services and combining them together in a Logic App.
A Logic App represents a workflow of steps that are defined to be done in a sequential or in a parallel manner.
Our scenario contains a company which owns an eshop. We are going to build a workflow for getting customer orders, pushing them into a queue for almost-real-time process (A queue is a good way to balance load of large number of requests in your servers), retrieving them back, storing them in a storage table and informing the user about her order with an email. The most important thing, we are going to develop all the steps inside the Azure Portal; the use of Visual Studio is optional.
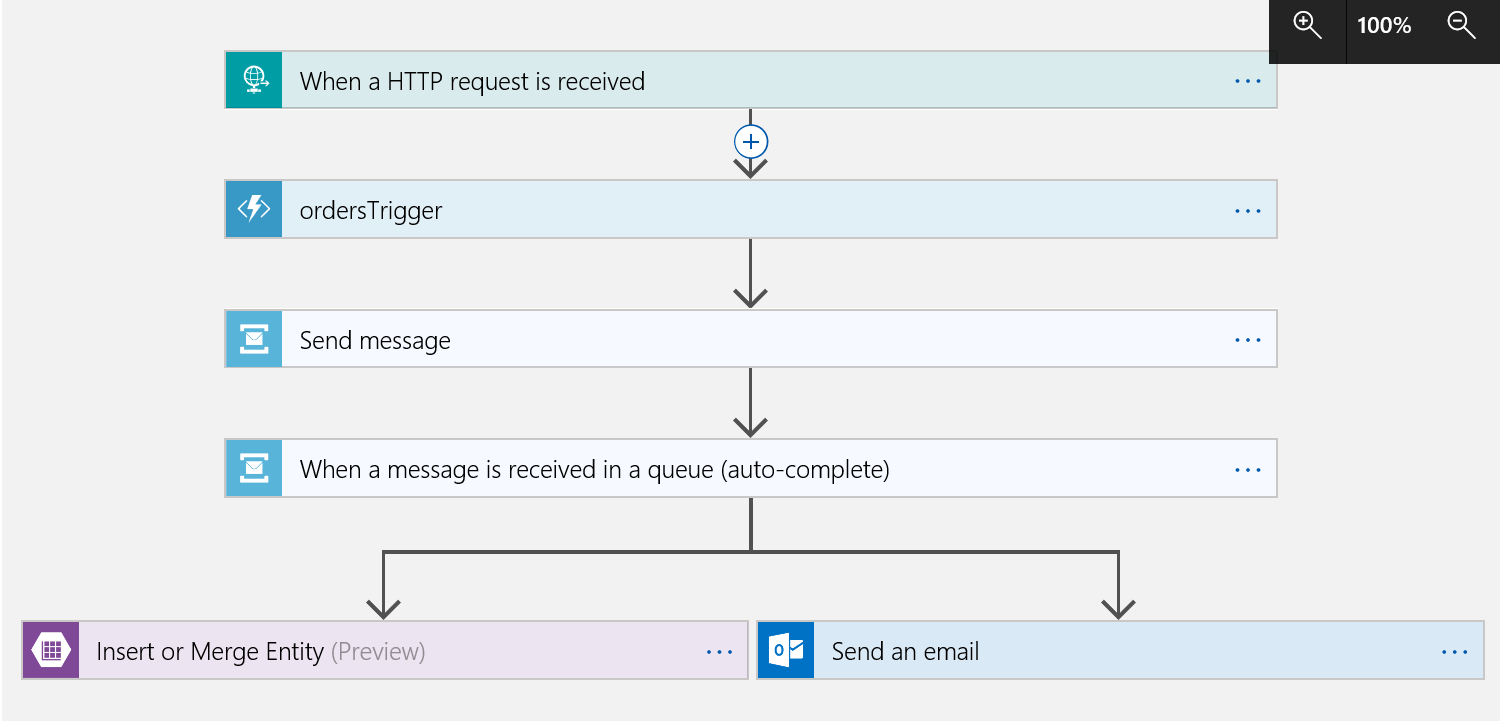
After we finish with the creation of our Logic App, we are going to have the following workflow:
Create the Azure Function
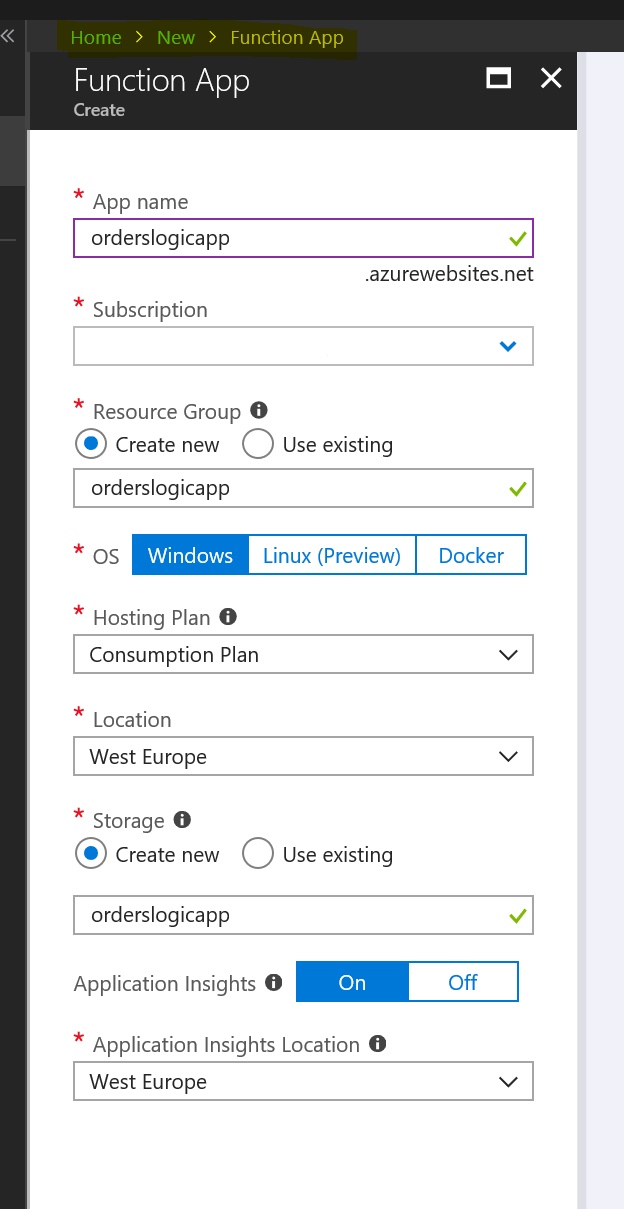
We first create an Azure Function. When a new order is created our Logic App will call this Function. For the purpose of the example, I created a new resource group and a new storage account (see the following image). I set the hosting plan to Consumption Plan so that I am getting billed only for the number or calls to the Functions of the Function App.
Now inside the Function App we create a new HTTP Trigger Function with C# code.
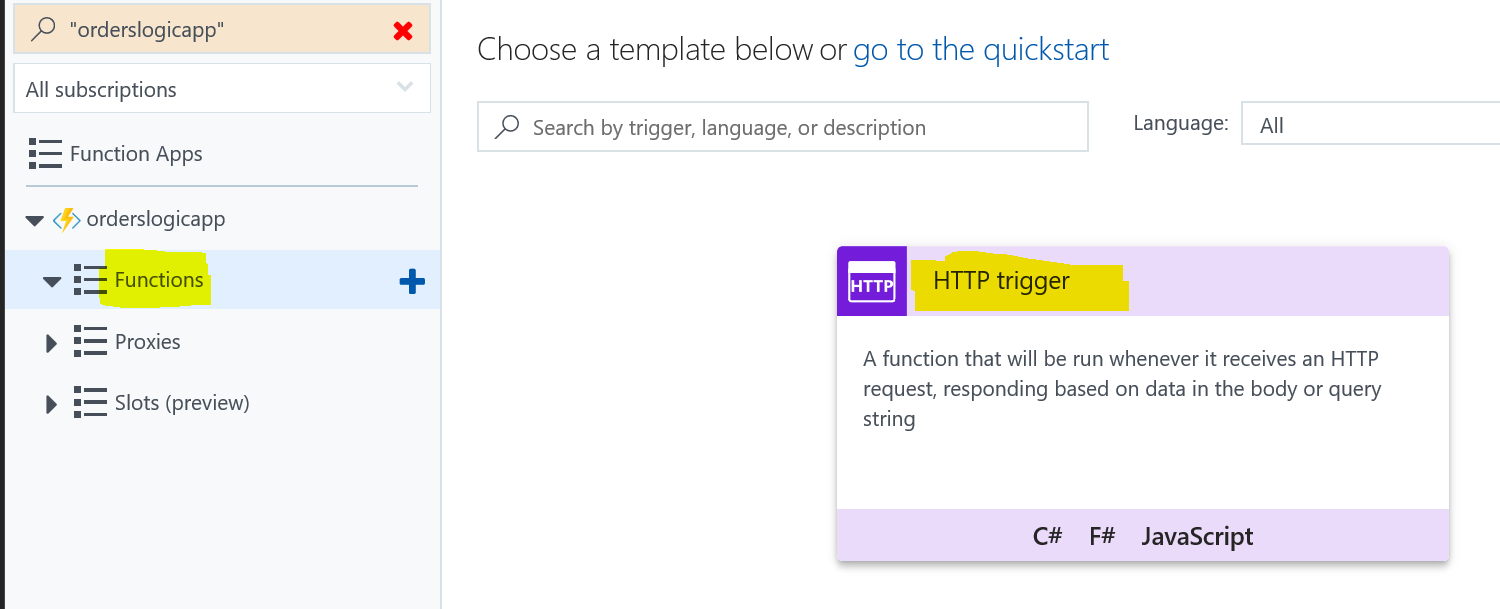
The Authorization Level is set to Function. We are creating a new model class for our orders and we are reading the body of HttpRequestMessage. Here is the code of the Function:
#r "Newtonsoft.Json"
using System.Net;
using Newtonsoft.Json;
using System.Text;

public static async Task<HttpResponseMessage> Run(HttpRequestMessage req, TraceWriter log)
{
    log.Info("C# HTTP trigger function processed a request.");

    var order = await req.Content.ReadAsAsync<Order>();
    var orderId = order?.Id;

    if (orderId == null)
    {
        return req.CreateResponse(HttpStatusCode.BadRequest, "Please pass a valid order id");
    }
    else
    {
        var jsonToReturn = JsonConvert.SerializeObject(order);
        return new HttpResponseMessage(HttpStatusCode.OK) {
            Content = new StringContent(jsonToReturn, Encoding.UTF8, "application/json")
        };
    }
}

public class Order {
    public string Id { get; set; }

    public string ItemId { get; set; }

    public int Size { get; set; }
}
As you can see we are serializing the JSON object, we set the Content-Type and we return a new HttpResponseMessage back.
Create the Service Bus
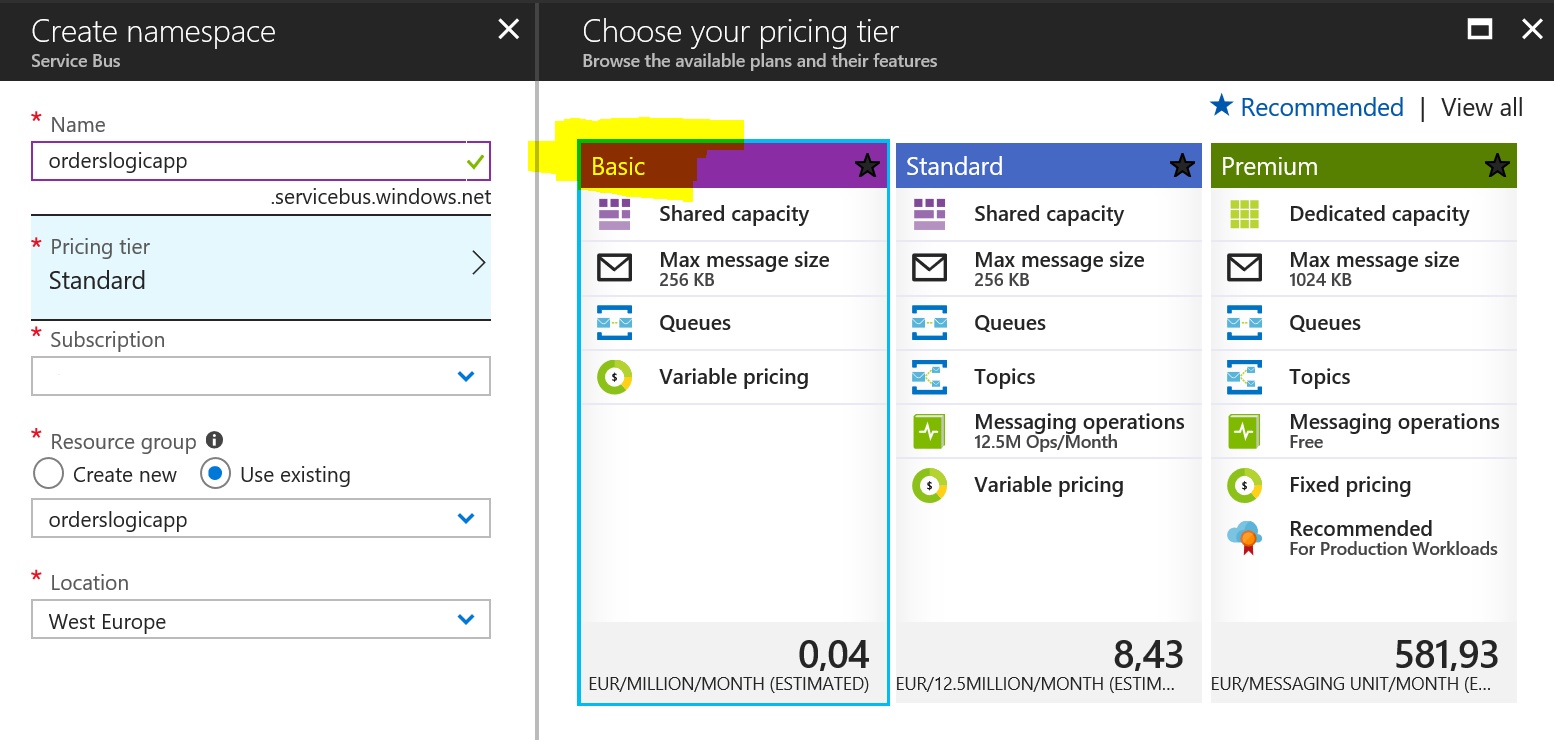
We need a new Service Bus which is going to get a new Queue to receive the messages sent from our Azure Function. We create a one in the Azure Portal. I choose the Basic Tier to minimize the costs:
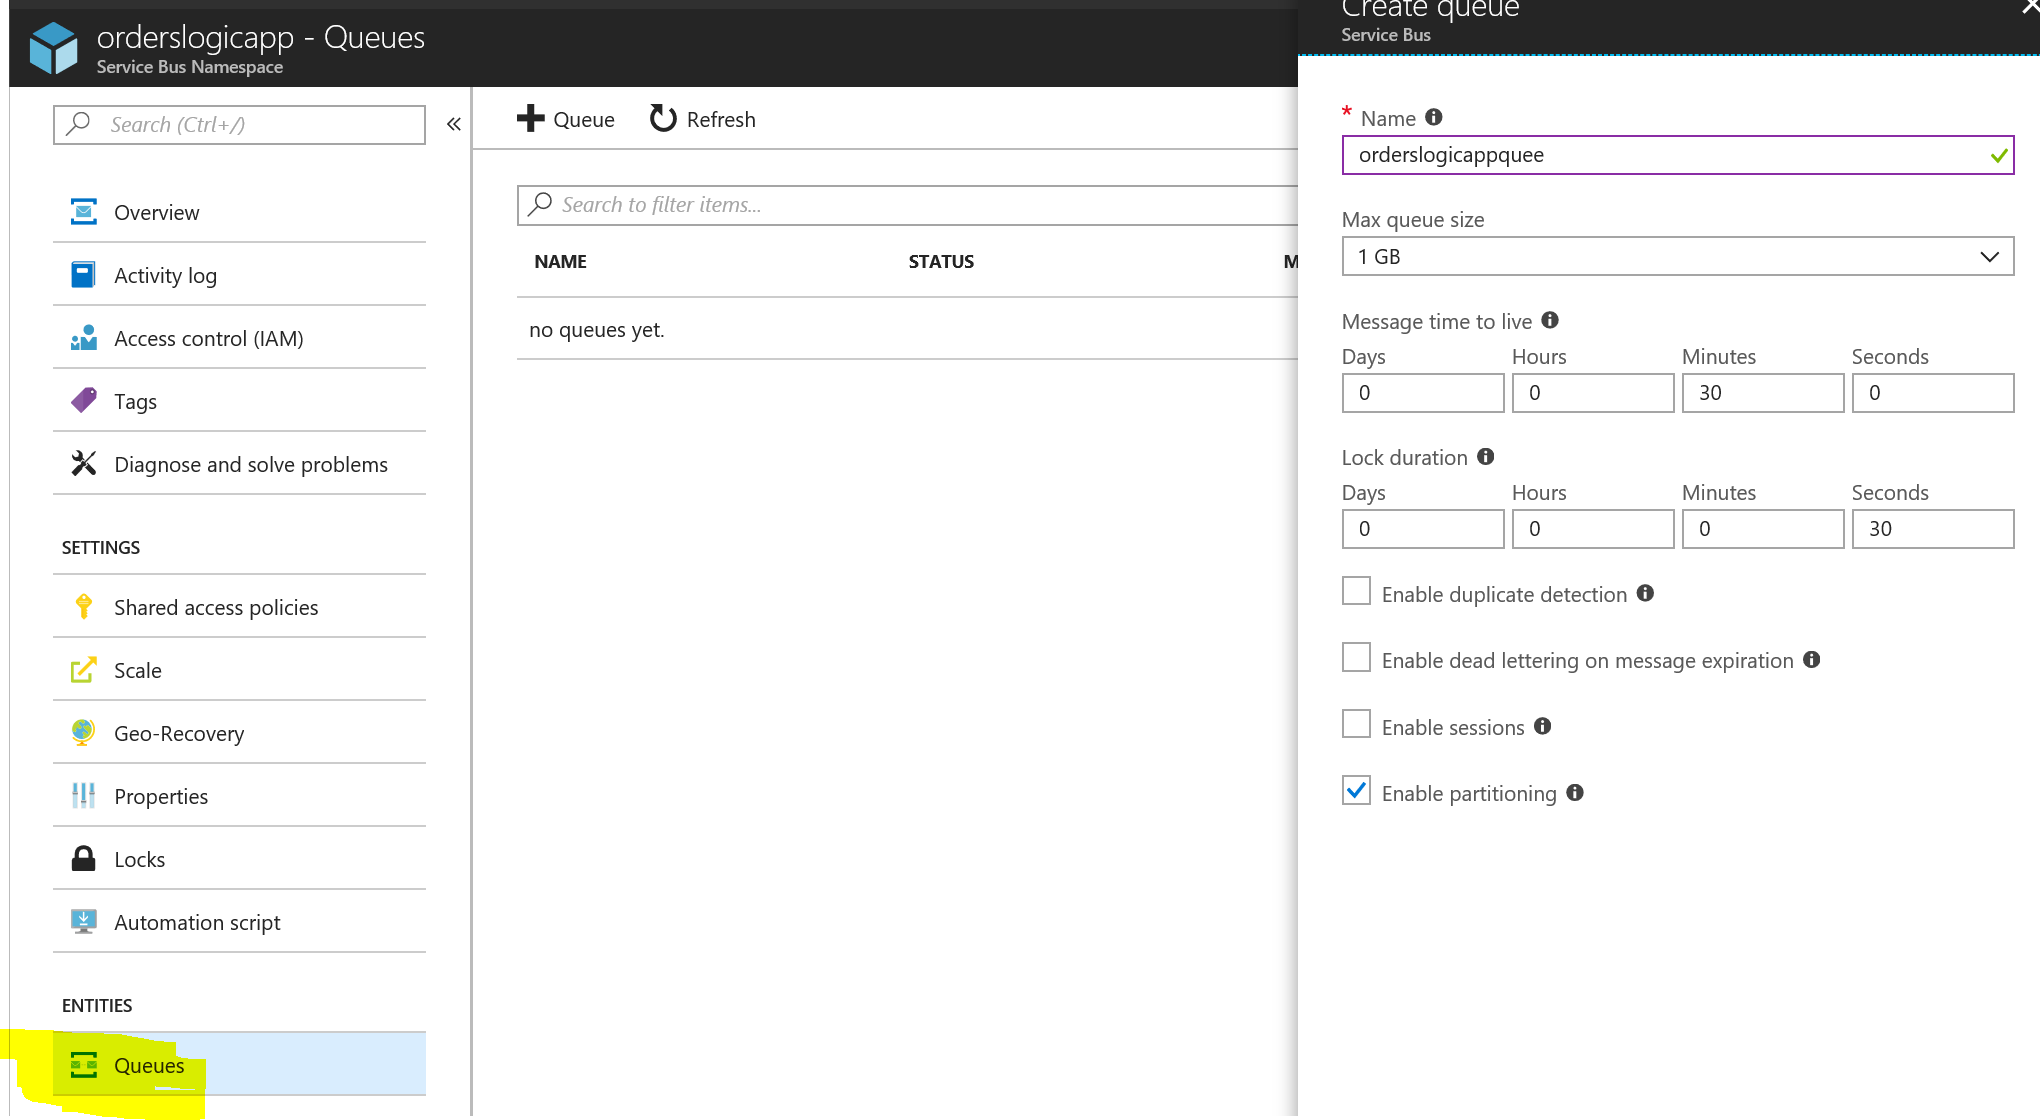
and we now create a queue. As you can see I decreased the time to live (TTL) of the stored messages, since in our scenario, the orders are getting processed very fast:
Wire up the Services in a new Logic App
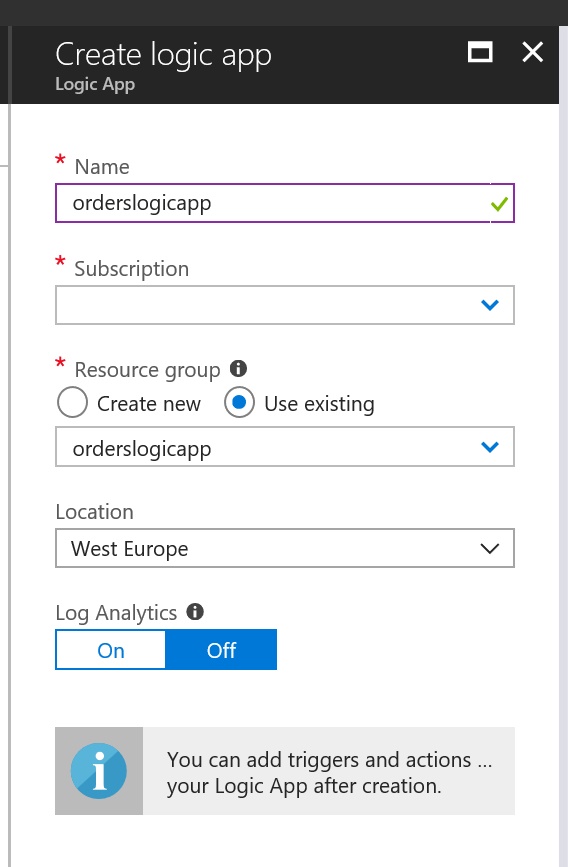
The next step is to wire up the Function with the Queue we just created. We start by creating a new Logic App:
We open the Logic App Designer, we pick the blank Logic App template and we start by adding the first step of our Logic App which is a When a HTTP request is received trigger. We have to use this step as an initial action, because a Function cannot be the access point of a logic app:
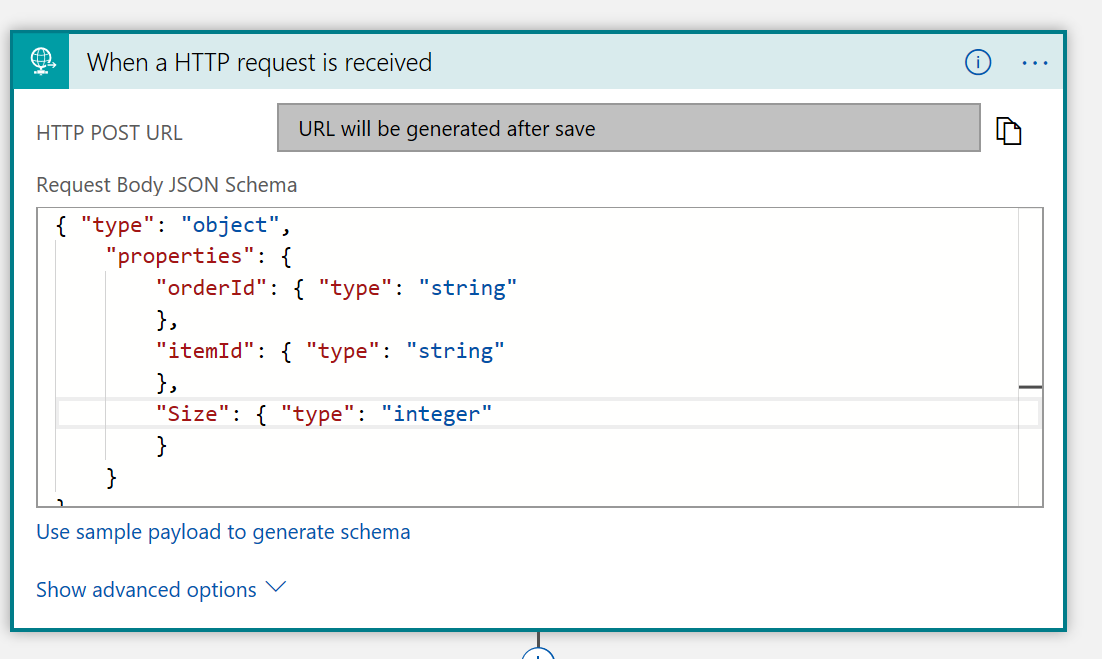
At this point, I have to mention that the first step makes your Logic App publicly accessible! It’s your duty to hide the Logic App behind a Firewall, Intranet, OpenId authentication or something similar.
As you can see we defined the schema of the JSON object that we are expecting. Azure can generate for you this schema if you pass in a sample object.
The second step of our Logic App is going to be the Function we created before. As input the Function gets the properties which passed into the first step and combines them into a JSON object:
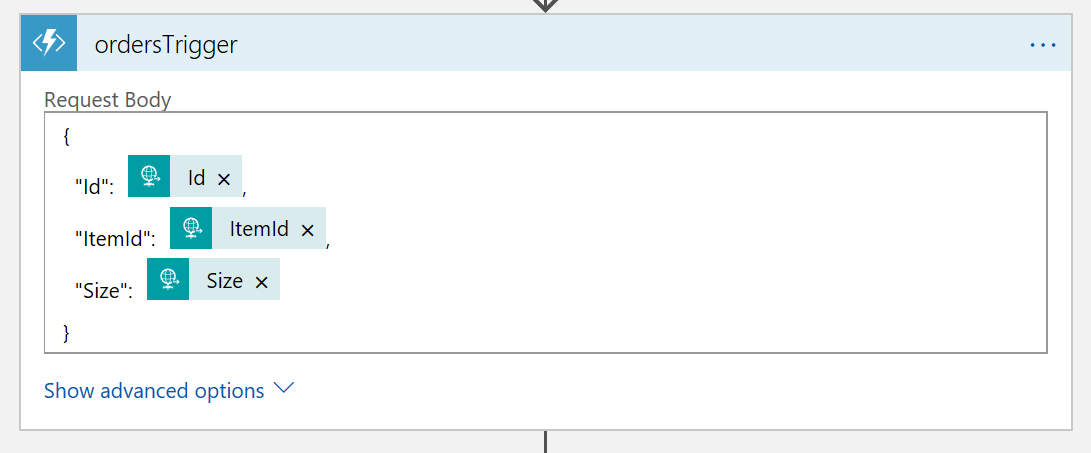
I have to point out that the use of a Function is optional. We could easily pass the data from step 1 to the next step, which is to send a message to the Service Bus Queue. I choose to use the Function because there might be the case that we want to apply extra logic to the incoming data.
We now create the third step which is to send a message to the Service Bus Queue. We take the Body of the Function as Content of the message:
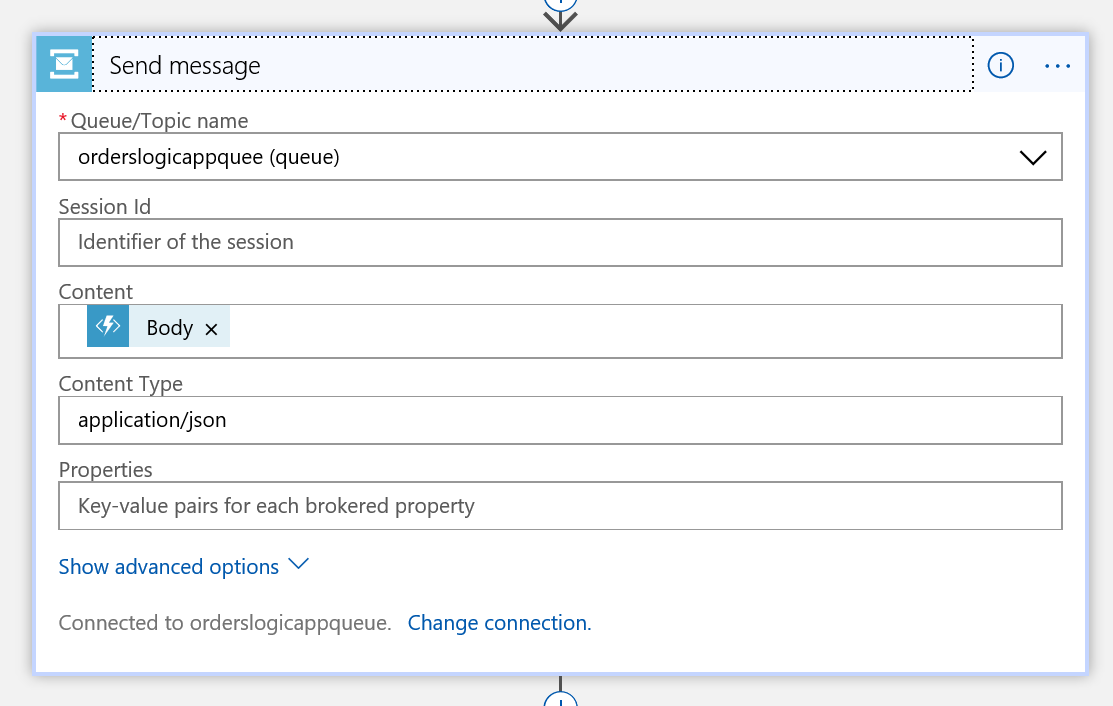
The message is now stored in the Queue, but we have to have a trigger which retrieves the message back from the Queue. We pick the When a message is received in a queue (auto-complete) trigger.

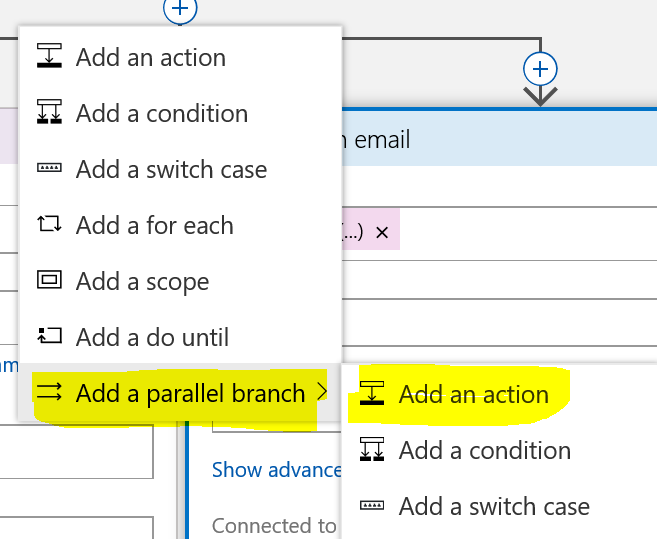
After we received back the order from the Queue there are two steps left for completing the workflow. We can do both steps in parallel so that we further accelerate the processing time:
The one step is to write the order in our Storage Table. For that we have to make a connection to an existing Storage Account of our Azure Subscription. We have to define the table which will store the documents and also pick a reasonable property for Partition Key (I picked the ItemId). The Row Key has to be a unique value:
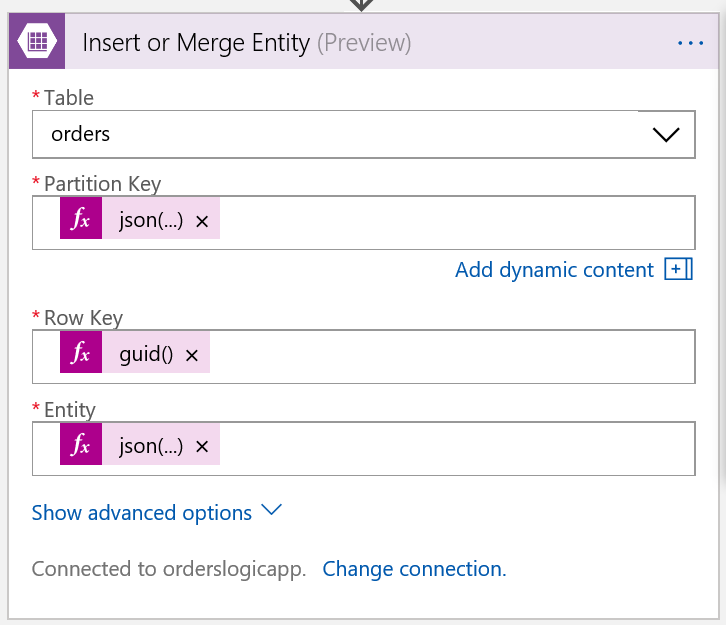
The message read from the Queue is encoded and has to be decoded before we can read it as a JSON object. For that we define the following Expression (example of the ItemId as Partition Key):
json(base64ToString(body('When_a_message_is_received_in_a_queue_(auto-complete)')?['ContentData'])).ItemId
For the Entity stored in the Storage Table we use this Expression:
json(base64ToString(body('When_a_message_is_received_in_a_queue_(auto-complete)')?['ContentData']))
The other step, which runs in parallel to the Insert or Merge Entity step, is to inform the customer about its order with an email. We first login in our Outlook account and then we can define the content, the subject and recipients of the email:
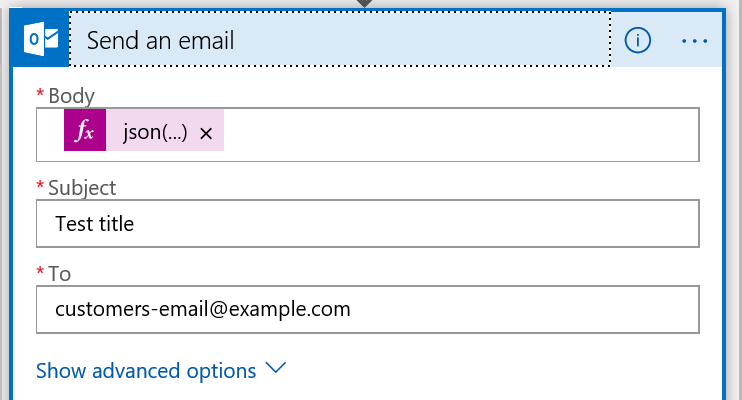
In the Body of the email I just send the Id of the order:
json(base64ToString(body('When_a_message_is_received_in_a_queue_(auto-complete)')?['ContentData'])).Id
That’s it! I hope you liked the example and that you tried the steps in your Azure Subscription. Drop me a line if you have any comments or questions.