How to create a .gitignore file for Visual Studio projects in Mac
If you want to store your source code in a repository that uses Git, you often have to create a .gitignore file which contains a black list of files that should not be committed to the repository. If now you are using Visual Studio for your projects the need for such a file is even bigger since this IDE creates a number of files (.exe, build, bin folders, etc.) that are only needed on your local machine.
With the release of Visual Studio for Mac we need to create a .gitignore file for our Visual Studio projects by using our Mac.
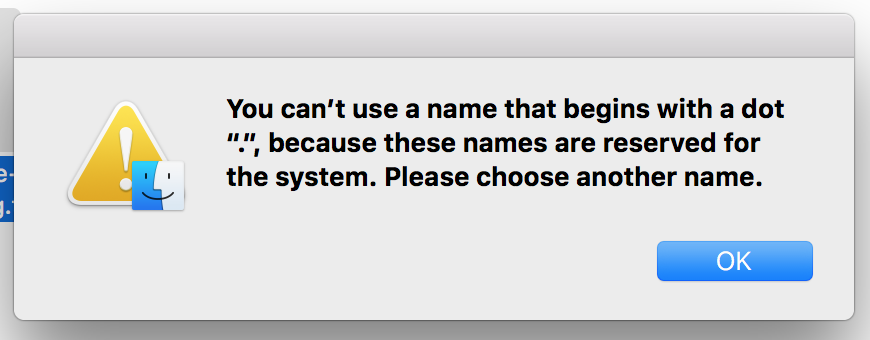
Just like when working with Windows, also in Mac you are not allowed to create a file which starts with a dot. This is true, when you have not activated the hidden files to be shown. If you try, you get the following warning:
However, if you have activated the option that the hidden files should be shown (see here for more information about how to activate this option) you can create such a file. Seeing all files, even the hidden ones, was for me not an ideal option. There is a reason why they are hidden in the first way.
Here are the steps to do to create a .gitignore file in Mac, even when the hidden files remain hidden:
-
Open a terminal and navigate to the folder which contains your Visual Studio projects.
-
Run the following command:
touch .gitignore. You do not see it, but a hidden .gitignore file was just created. -
Run the following command:
vim .gitignore. This opens the empty file with a text editor inside the terminal. -
Go to this URL of the official GitHub repository and copy the contents of the file.
-
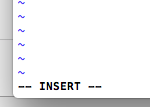
Paste the contents into the opened vim text editor. If you scroll at the bottom of the text editor you now see the – INSERT – text which means that the content is ready to be saved:
-
To save the file press ESC, type :wq and finally press ENTER. What you just saved is a complete .gitignore file with a black list specifically for use in Visual Studio projects.
Even if you do not see the file, the .gitignore file is there, inside your project folder and will be committed to your Git repository the next time you do a commit.
If you want to do changes to the file simply repeat step 3, do the needed changes and then do step 6. Then you can again commit the changed file to you Git repository.
P.S.: If you have activated the option for showing the hidden files and while you are on step 3 you see an .swp file inside your project’s folder you have to know that this file is a temporary file and going to be deleted once you close the vim text editor. So you do not have to commit this file to your repository
I hope this helps the users of the new Visual Studio for Mac. Drop me a line if you have any comments.