Deploy a .NET & Angular application to an Azure App Service with multiple environments using an Azure Pipeline and Bicep
In this article, I will show you a full tutorial on how to create a .NET application using Angular for the frontend and deploy this application with Azure DevOps pipelines on multiple App Service environments.
You are going to learn:
- How to use pipeline templates to simplify the structure of our pipeline
- How to use multiple stages to split semantically different jobs
- How to use multiple Azure environments by elevating the power of a for loop in the pipeline
- How to use Bicep for setting up the needed Azure infrastructure
- How to deploy the application on an Azure App Service by using different deployment slots
You can find the code for this tutorial on my GitHub account.
1. Initialize a new Git repository
First, navigate to a local folder that will host the application and initialize a new git repository with the git init command.
Next, start a new Visual Studio Code window from the current repository. For that, type code . in the path input-field in the file explorer.
2. Create the .NET application
Inside Visual Studio Code, open a new terminal and type the following command:
dotnet new angular -o dotnet-angular-application
This will bootstrap a new C# project that uses Angular for the frontend. In this tutorial, we do not focus on the content of the application but on the DevOps part of it, so we leave the application code as is for the moment.
The files created contain a .gitignore file. Open it and on a new line add .vscode. This way, we avoid checking in this folder, which is only needed locally.
Stage and commit all changes with the git add --all and then the git commit -m "init commit" commands.
3. Create a new Azure DevOps project
Navigate to the Azure DevOps website of your organization and create a new project for hosting the application. I named the project dotnet-angular-application.
Copy the following commands and adapt the XXXs based on the URL of your organization to wire your local repository to the new Azure DevOps online repository.
git remote add origin https://[email protected]/XXX/dotnet-angular-application/_git/dotnet-angular-application
git push -u origin --all
4. Create a new pipeline
In the root folder of your application, create a new azure-pipeline.yml file. Since in this tutorial I want to give you a real-life example of a build and release pipeline structure, I am going to use multiple stages in our pipeline and split them into separate files by using the template keyword.
Copy the following content into the azure-pipeline.yml file.
trigger:
- main

pool:
  vmImage: 'ubuntu-latest'

# Define the available environments as a list of strings and use them in the following for-loop for deploying to multiple environments
parameters:
  - name: environments
    type: object
    default:
      - dev
      - prod

stages:
- stage: AngularApplication
  jobs:
  - template: ./pipelines/templates/angular-application.yml
- stage: DotnetApplication
  jobs:
  - template: ./pipelines/templates/dotnet-application.yml
- ${{ each env in parameters.environments }}: # Create a new stage for each environment
  - stage: DeployTo${{ env }}
    dependsOn: DotnetApplication
    condition: succeeded()
    jobs:
        - template: ./pipelines/templates/deploy-to-environment.yml
          parameters:
            environment: ${{ env }}
As you can see, the azure-pipeline.yml file works as the orchestrator for the included job templates. You can find more information about the different template types on this Microsoft Learn article.
We are using in total three templates:
- The first two templates are for building and publishing our application. We separate them into two stages based on the technologies used, Angular and .NET.
- The third template is for deploying our application on the available environments. For this tutorial we define two environments,
devandprod. We use a for loop to iterate over the available environments and call the same template pipeline with a different parameter. This way, we centralize our deployment logic into one template and avoid duplication of code.
Before using these environments, you will have to first create them in Azure DevOps. Navigate to Pipelines -> Environments and click on New environment:
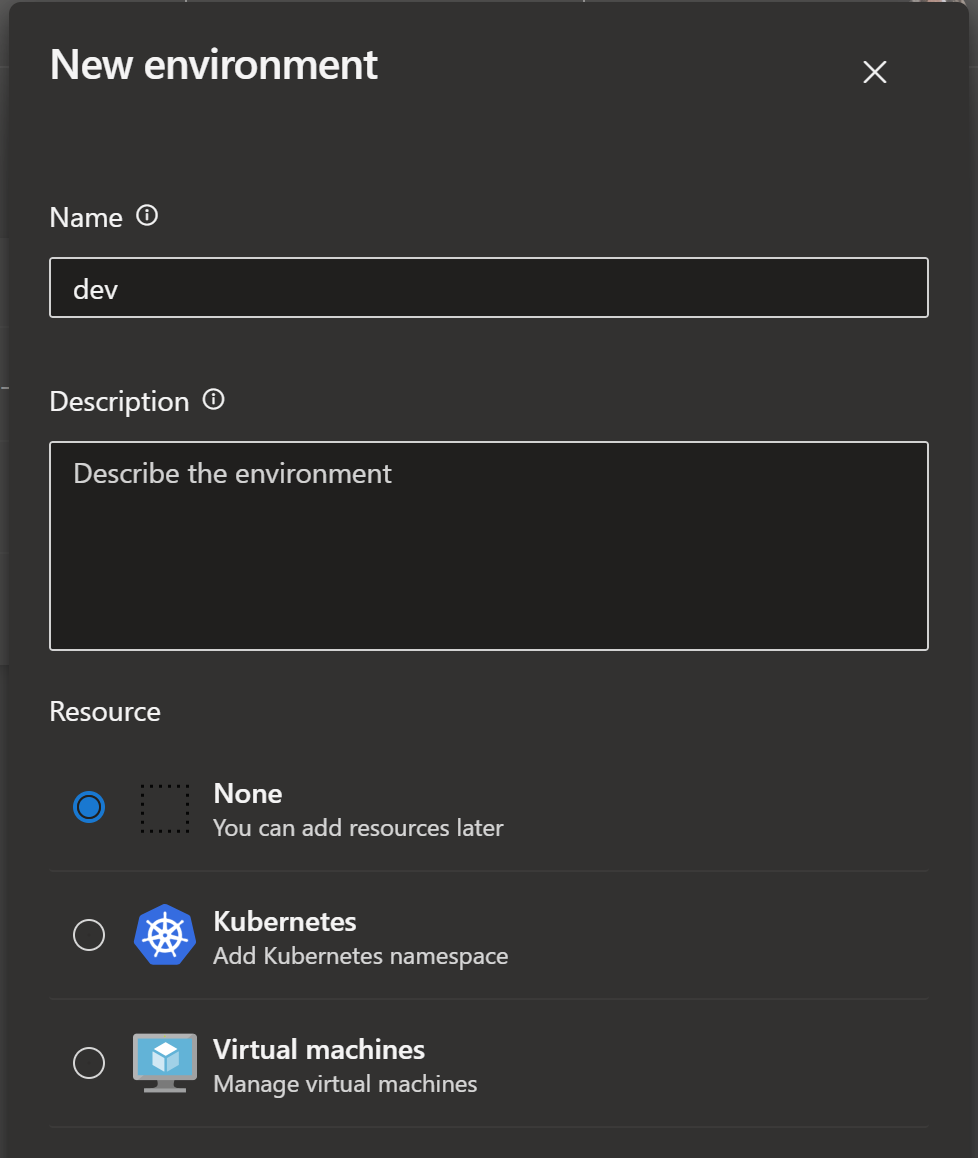
Repeat the same step for the prod environment. However, this time you will add a manual approval step. Click on the Approvals and checks tab, then on View all checks and then click on the Approvals option and click on Next:
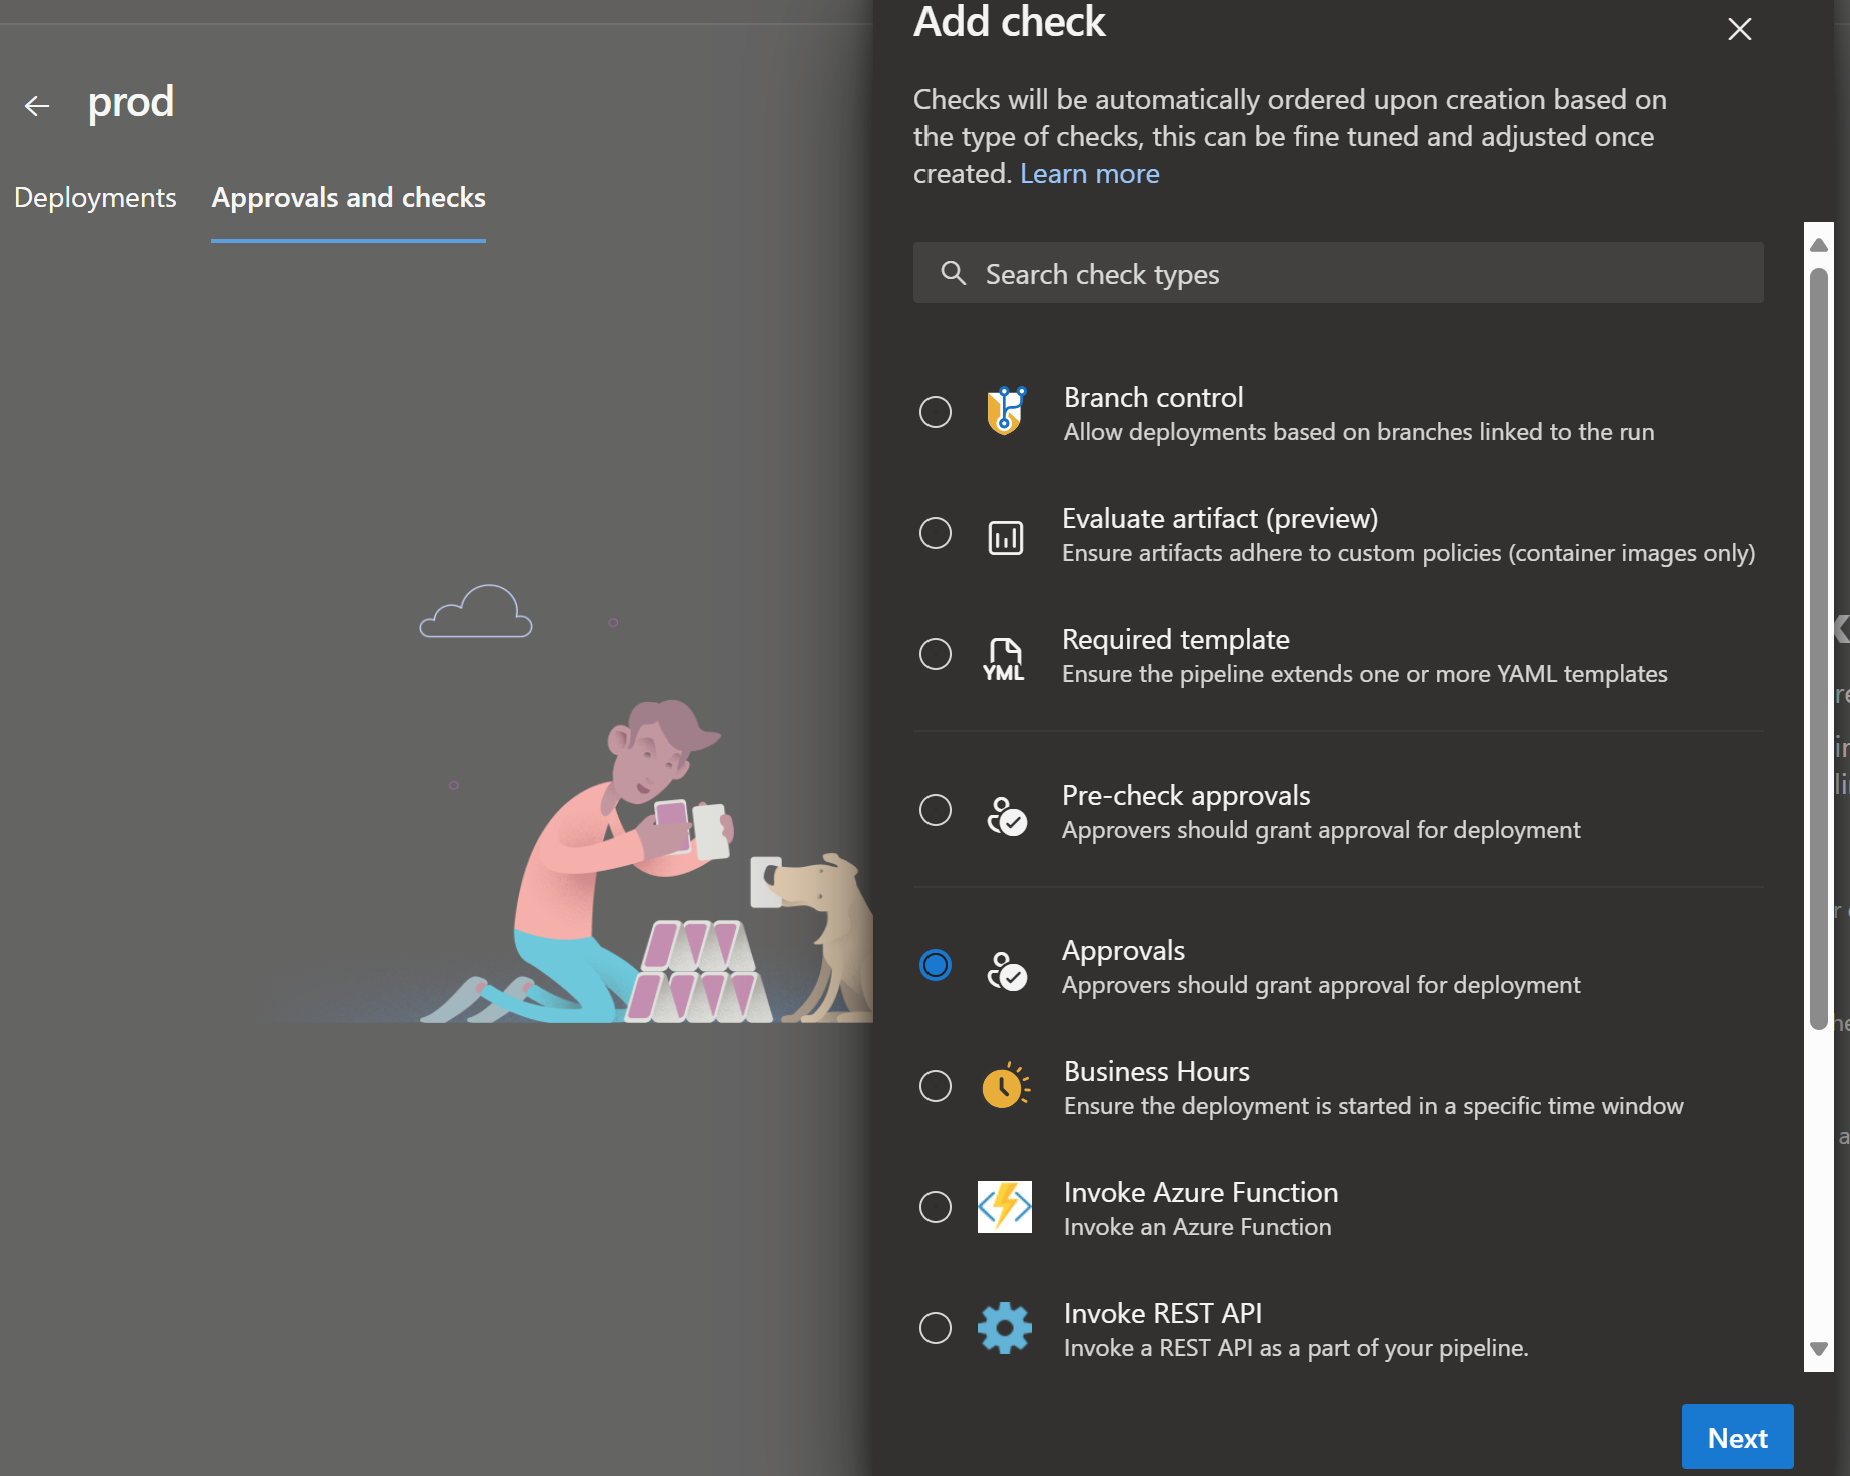
Define the users who can approve the deployment on the prod environment and click on Create.
5. Create the template for building the Angular application
If you created the application by using the dotnet command provided at the beginning of the tutorial, then inside the .csproj file of your project you can see that both Angular and .NET applications are built when we start the application locally with F5 or when you run the dotnet build command.
This means that we could simply use the dotnet build command in our pipeline and build both applications. However, since we want some separation of concerns, we are going to split the build into two.
Create a new pipelines folder on the root of your application and inside it a new templates folder with a new angular-application.yml file. Add the following content in it and pay extra attention to the displayName of the tasks and the comments in order to understand what is happening and why.
jobs:
  - job: BuildAndPublish
    displayName: 'Build and publish'
    steps:
    # Since the Angular application is inside the ClientApp folder, we first have to navigate there
    - script: |
        cd ./ClientApp
        npm install -g @angular/cli
        npm install
      displayName: 'Install Angular CLI and npm packages'

    - task: NodeTool@0
      displayName: 'Install Node.js'
      inputs:
        versionSpec: '18.x'

    # The ng build will create a dist folder with the build content
    - script: |
        cd ./ClientApp
        ng build --configuration production
      displayName: 'Build Angular Project'

    - task: CopyFiles@2
      displayName: 'Copy files from dist to artifactstagingdirectory'
      inputs:
        SourceFolder: './ClientApp/dist'
        Contents: '**'
        TargetFolder: '$(build.artifactstagingdirectory)'

    - task: PublishBuildArtifacts@1
      displayName: 'Publish Build Artifacts inside angularApp folder'
      inputs:
        PathtoPublish: '$(Build.ArtifactStagingDirectory)'
        ArtifactName: 'angularApp'
The next step is to update the .csproj file and allow it to build the Angular application only on Debug mode. To achieve that, we add the Condition=" '$(Configuration)' == 'Debug'" condition.
<Project Sdk="Microsoft.NET.Sdk.Web">

  <PropertyGroup>
    <TargetFramework>net8.0</TargetFramework>
    <Nullable>enable</Nullable>
    <IsPackable>false</IsPackable>
    <SpaRoot>ClientApp\</SpaRoot>
    <SpaProxyServerUrl>https://localhost:44454</SpaProxyServerUrl>
    <SpaProxyLaunchCommand>npm start</SpaProxyLaunchCommand>
    <RootNamespace>AngularDotNetApplication</RootNamespace>
    <ImplicitUsings>enable</ImplicitUsings>
  </PropertyGroup>

  <ItemGroup>
    <PackageReference Include="Microsoft.AspNetCore.SpaProxy" Version="7.0.18" />
  </ItemGroup>

  <ItemGroup>
    <!-- Don't publish the SPA source files, but do show them in the project files list -->
    <Content Remove="$(SpaRoot)**" />
    <None Remove="$(SpaRoot)**" />
    <None Include="$(SpaRoot)**" Exclude="$(SpaRoot)node_modules\**" />
  </ItemGroup>

    <Target Name="DebugEnsureNodeEnv" BeforeTargets="Build" Condition="'$(Configuration)' == 'Debug' And !Exists('$(SpaRoot)node_modules')">
    <!-- Ensure Node.js is installed -->
    <Exec Command="node --version" ContinueOnError="true">
      <Output TaskParameter="ExitCode" PropertyName="ErrorCode" />
    </Exec>
    <Error Condition="'$(ErrorCode)' != '0'" Text="Node.js is required to build and run this project. To continue, please install Node.js from https://nodejs.org/, and then restart your command prompt or IDE." />
    <Message Importance="high" Text="Restoring dependencies using 'npm'. This may take several minutes..." />
    <Exec WorkingDirectory="$(SpaRoot)" Command="npm install" />
  </Target>

  <Target Name="PublishRunWebpack" AfterTargets="ComputeFilesToPublish" Condition="'$(Configuration)' == 'Debug'">
    <!-- As part of publishing, ensure the JS resources are freshly built in production mode -->
    <Exec WorkingDirectory="$(SpaRoot)" Command="npm install" />
    <Exec WorkingDirectory="$(SpaRoot)" Command="npm run build -- --configuration production" />

    <!-- Include the newly-built files in the publish output -->
    <ItemGroup Condition="'$(Configuration)' == 'Debug'">
      <DistFiles Include="$(SpaRoot)dist\**; $(SpaRoot)dist-server\**" />
      <ResolvedFileToPublish Include="@(DistFiles->'%(FullPath)')" Exclude="@(ResolvedFileToPublish)">
        <RelativePath>wwwroot\%(RecursiveDir)%(FileName)%(Extension)</RelativePath>
        <CopyToPublishDirectory>PreserveNewest</CopyToPublishDirectory>
        <ExcludeFromSingleFile>true</ExcludeFromSingleFile>
      </ResolvedFileToPublish>
    </ItemGroup>
  </Target>
</Project>
6. Create the template for building the .NET application
Inside the pipelines/templates folder add a new dotnet-application.yml file. Add the following content in it and pay extra attention to the displayName of the tasks in order to understand what is happening and why.
jobs:
  - job: BuildAndPublish
    displayName: 'Build and publish'
    variables:
      buildConfiguration: 'Release'
    steps:
    - task: UseDotNet@2
      inputs:
        packageType: 'sdk'
        version: '8.x'
        installationPath: $(Agent.ToolsDirectory)/dotnet

    - task: DotNetCoreCLI@2
      displayName: Restore
      inputs:
        command: restore
        projects: '**/*.csproj'

    - task: DotNetCoreCLI@2
      displayName: Build
      inputs:
        command: build
        projects: '**/*.csproj'
        configuration: $(buildConfiguration)

    - task: DotNetCoreCLI@2
      displayName: Publish
      inputs:
        command: publish
        publishWebProjects: true
        arguments: '--configuration $(BuildConfiguration) --output $(Build.ArtifactStagingDirectory)'
        zipAfterPublish: false

    - task: PublishBuildArtifacts@1
      displayName: 'Publish Build Artifacts inside dotnetApp folder'
      inputs:
        PathtoPublish: '$(Build.ArtifactStagingDirectory)'
        ArtifactName: 'dotnetApp'
7. Create a template for deploying the application
Inside the pipelines/templates folder add a new deploy-to-environment.yml file. Add the following content in it and pay extra attention to the displayName of the tasks in order to understand what is happening and why.
# Gets the environment name from the caller and use it in tasks
parameters:
  - name: environment
    type: string

jobs:
  - deployment: Deploy${{ parameters.environment }} # Each job has to have a unique name, so we use the environment name
    environment: ${{ parameters.environment }}
    variables:
      location: 'XXX' # Define the value you want for location
      webAppName: 'XXX' # Define the value you want for the name of the application
      slotName: '${{ parameters.environment }}-slot'
      resourceGroupName: 'XXX' # Define the value you want for the Azure Resource Group name
      templateFile: './pipelines/bicep/main.bicep'
      parametersFile: './pipelines/bicep/main.bicepparam'
    strategy:
      runOnce:
        deploy:
          steps:
          - checkout: self # avoids issue with bicep files not being found.
          - task: DownloadPipelineArtifact@2
            inputs:
              artifact: 'angularApp'
              path: '$(Build.ArtifactStagingDirectory)/angularApp/'
          - task: DownloadPipelineArtifact@2
            inputs:
              artifact: 'dotnetApp'
              path: '$(Build.ArtifactStagingDirectory)/dotnetApp/'

            # We combine the two applications in one new folder. The Angular app is stored inside a new wwwroot folder. This folder is then going to be served from the WebApp
          - script: |
              mkdir -p $(Build.ArtifactStagingDirectory)/application
              cp -r $(Build.ArtifactStagingDirectory)/dotnetApp/s/* $(Build.ArtifactStagingDirectory)/application/
              cp -r $(Build.ArtifactStagingDirectory)/angularApp/* $(Build.ArtifactStagingDirectory)/application/wwwroot
            displayName: 'Combine Artifacts'

            # Zip the whole content of the application folder together
          - task: ArchiveFiles@2
            displayName: 'Zip all files under /application/ together'
            inputs:
              rootFolderOrFile: '$(Build.ArtifactStagingDirectory)/application'  # The folder or file to archive
              includeRootFolder: false  # Whether to include the root folder in the archive
              archiveType: 'zip'  # The type of archive to create
              archiveFile: '$(Build.ArtifactStagingDirectory)/application.zip'  # The path to the output archive file
              verbose: true

          - task: AzureCLI@2
            displayName: 'Deploy Bicep to ${{ parameters.environment }} Environment'
            inputs:
              azureSubscription: 'XXX' # Define a new Azure DevOps Service Connection and use its name here
              scriptType: bash
              scriptLocation: inlineScript
              useGlobalConfig: false
              inlineScript: |
                az --version
                az group create --name $(resourceGroupName) --location $(location)
                az deployment group create --resource-group $(resourceGroupName) --template-file $(templateFile) --parameters $(parametersFile)

          - task: AzureCLI@2
            displayName: 'Create ${{ parameters.environment }} Deployment Slot'
            inputs:
              azureSubscription: 'XXX' # Use the same name of the Service Connection as before
              scriptType: bash
              scriptLocation: inlineScript
              useGlobalConfig: false
              inlineScript: |
                az webapp deployment slot create --name $(webAppName) --resource-group $(resourceGroupName) --slot $(slotName)

          - task: AzureWebApp@1
            inputs:
              azureSubscription: 'XXX' # Use the same name of the Service Connection as before
              appType: 'webApp'
              appName: $(webAppName)
              package: '$(Build.ArtifactStagingDirectory)/application.zip'
              slotName: $(slotName)
            displayName: 'Deploy to ${{ parameters.environment }} Slot'
In order to create a new Service Connection in Azure DevOps follow the steps described in this Microsoft article.
8. Create a new Bicep file for the needed Azure infrastructure
Bicep is a great way for implement Infrastructure as Code (IaC) for creating new Azure Resources. Our application is hosted on a Linux WebApp and we also want to create an MSSQL database for feature use.
Inside the pipelines folder add a new bicep folder and inside it a main.bicep file. Copy the following content into it:
@description('The name of the SQL logical server.')
param serverName string

@description('The name of the SQL Database.')
param sqlDBName string

@description('Location for all resources.')
param location string

@description('The administrator username of the SQL logical server.')
param administratorLogin string

@description('The administrator password of the SQL logical server.')
@secure()
param administratorLoginPassword string

@description('The name of the App Service plan.')
param appServicePlanName string

@description('The name of the App Service.')
param webAppName string

resource sqlServer 'Microsoft.Sql/servers@2023-08-01-preview' = {
  name: serverName
  location: location
  properties: {
    administratorLogin: administratorLogin
    administratorLoginPassword: administratorLoginPassword
  }
}

resource sqlDB 'Microsoft.Sql/servers/databases@2023-08-01-preview' = {
  parent: sqlServer
  name: sqlDBName
  location: location
  sku: {
    name: 'Basic'
    tier: 'Basic'
  }
}

resource appServicePlan 'Microsoft.Web/serverfarms@2023-12-01' = {
  name: appServicePlanName
  location: location
  properties: {
    reserved: true
  }
  sku: {
    name: 'S1' // This is the minimum pricing plan which supports deployment slots. If you use a Free plan, then you will have to deactivate the step which creates the deployment slots
    tier: 'Standard'
  }
  kind: 'linux' // Do not forget to add this, otherwise you get the error that linuxFxVersion: 'DOTNETCORE|8.0' is not recognized
}

resource webApp 'Microsoft.Web/sites@2023-12-01' = {
  name: webAppName
  location: location
  kind: 'app,linux'
  properties: {
    serverFarmId: appServicePlan.id
    httpsOnly: true
    siteConfig: {
      linuxFxVersion: 'DOTNETCORE|8.0'
      appSettings: [
        {
          name: 'WEBSITE_RUN_FROM_PACKAGE' // Do not forget to add this, since we run the application from a .zip file
          value: '1'
        }
      ]
    }
  }
}
Next, create a new main.bicepparam file inside the pipelines/bicep folder, add the following content, and update the values of the parameters:
using 'main.bicep'

// Define the values for each one of this parameters based on your needs.
param serverName = 'XXX'
param sqlDBName = 'XXX'
param location = 'XXX'
param administratorLogin = 'XXX'
param administratorLoginPassword = 'XXX'
param appServicePlanName = 'XXX'
param webAppName = 'XXX'
9. Test the pipeline on Azure DevOps
Navigate to your Azure DevOps instance and then click on Pipelines and then on New pipeline. Select Azure Repos Git, select the repository we created for this tutorial and then select the following option:
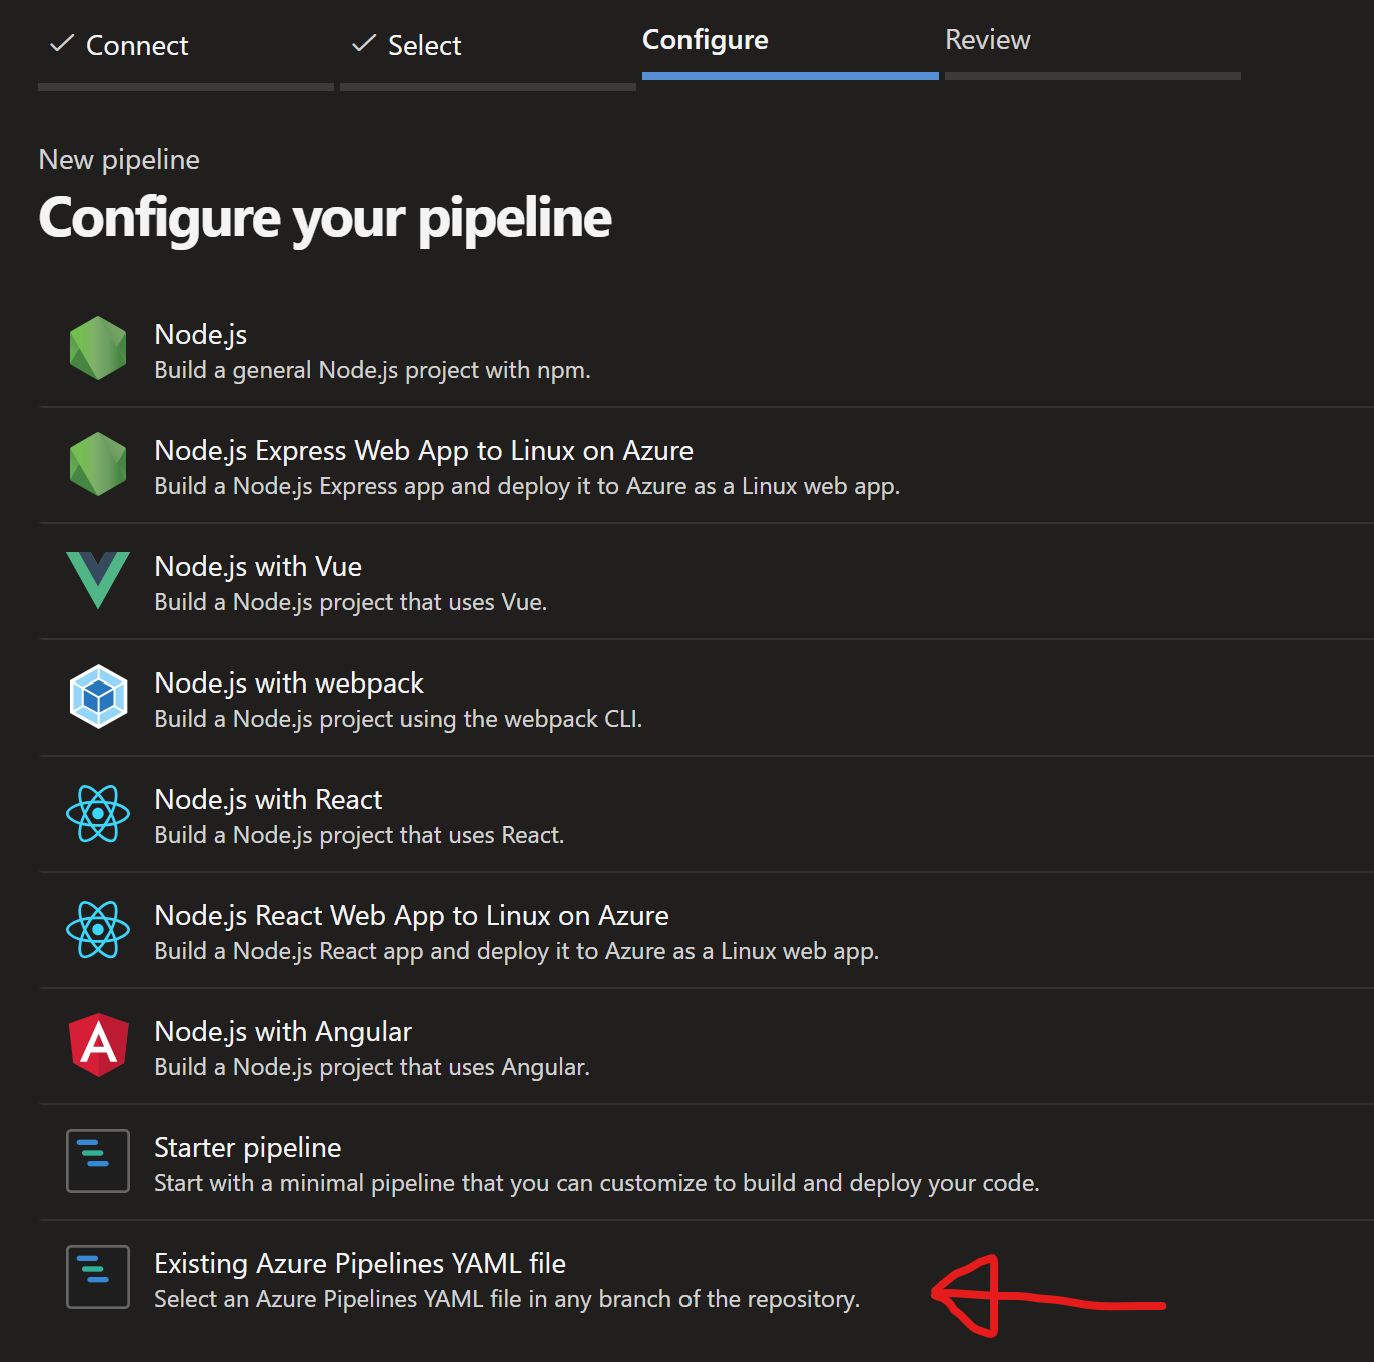
With your pipeline created, click on Run to run it for the first time. If you did every step described in this tutorial correctly, a new pipeline instance with four stages is created and after some minutes finishes by creating all the new Azure Resources and deploying the app on a new Azure WebApp.
If you face any kinds of errors, feel free to contact me with a comment and I will get back to you.
Conclusion
I believe this tutorial was more than a basic example on the question “How to build and deploy a .NET application?”. I tried to give you the way of reusing .yml files, combining the deployment with Infrastructure as Code and deploying on multiple environments. I hope you enjoy the tutorial as much as I did writing it :)